Page 1 of 1
Progress restoring gpa#8787 frame
Posted: Sun Jun 24, 2007 8:13 pm
by leo verhagen
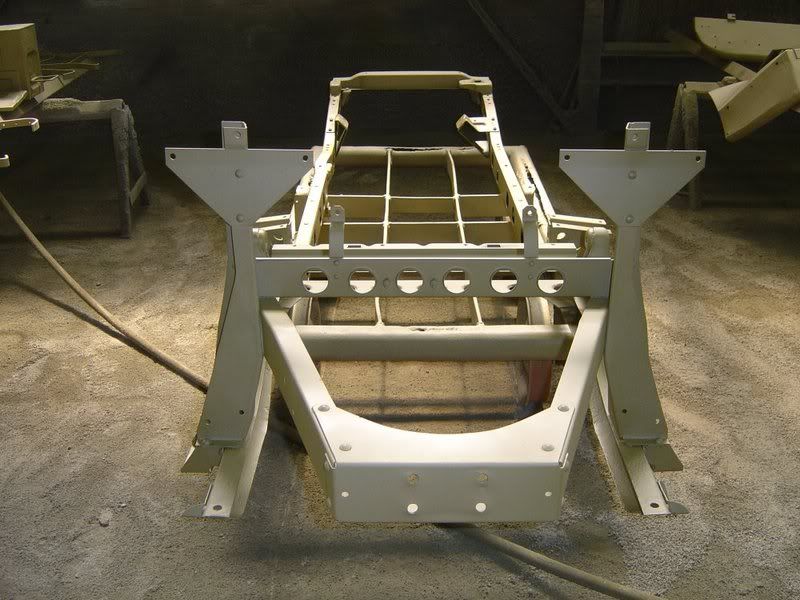
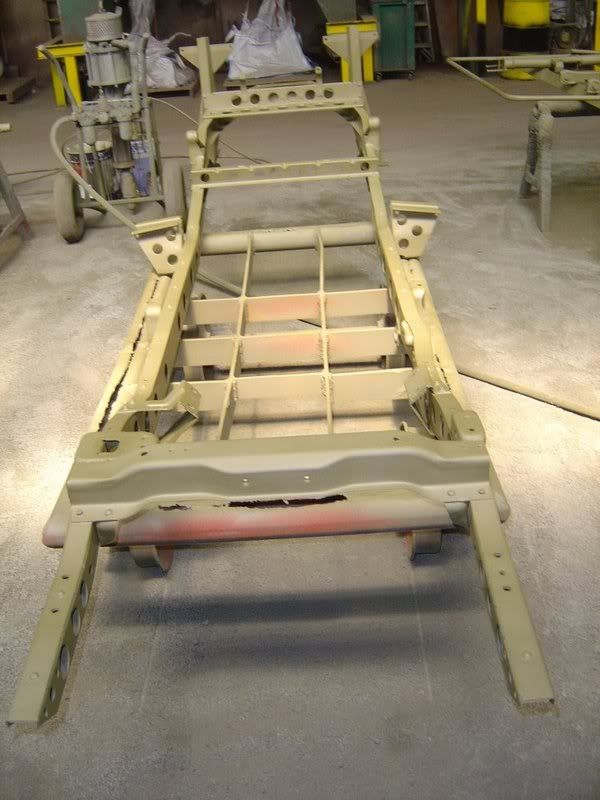
My frame returned from the sandplaster and primed with 2 component primer:
Posted: Sun Jun 24, 2007 11:31 pm
by Donovan
Leo,
The frame looks great. I almost thought there were some additions to it until I saw what it was setting on. Great job!
I am just about that period where I must take my frame to the welder so that the corrections to the hull match where the frame actually bolts through (rear hanger locations). I am very curious how much adjustment they made at the factory to get the hull and frame to match correctly. I think there must have been a lot of shims (more than I have seen).
Any opinions?
Good luck,
Donovan.
Posted: Mon Jun 25, 2007 10:10 am
by GPA2196
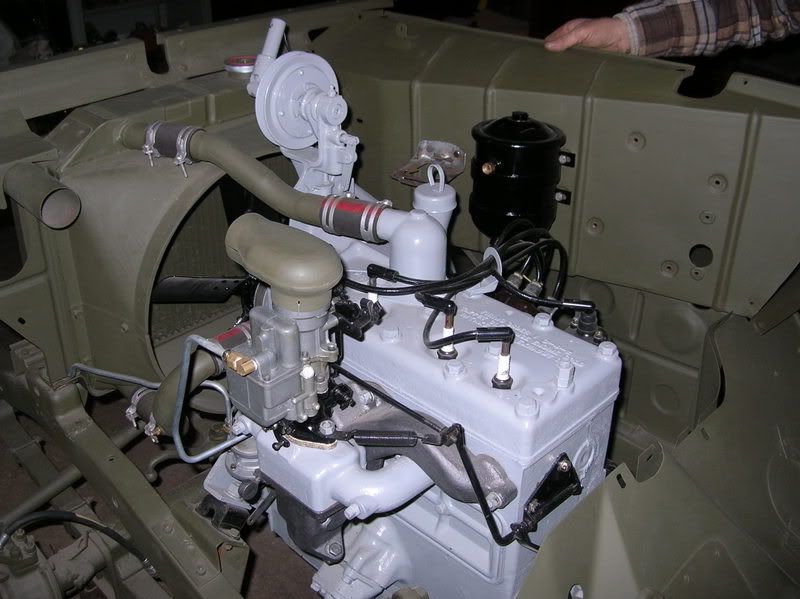
Looks great Leo! Are you going to build the chasis stand alone like I did? The chasis can now drive under its own power like this... and its good to make sure the drivetrain is running well and not leaking before assembly... we found two leaks that would have been a pain after assembly. The hull is now all primered and ready for paint. I'm using the 33070 color as seen below, We put several coats of 2 part epoxy primer on to protect the metal.
We plan on taking the axles, and rear floor off and then lowering the whole assembly into the hull with the forklift.... it should be interesting... I've been reading through Richard Sander's Assembly manual and have gleaned several hints from it.... since I'm putting in a completed chasis it differs a bit, but still lots of good tips.... I plan on installing the seal boots before lowering in the chasis assembly... will need to be extra cautious on that.
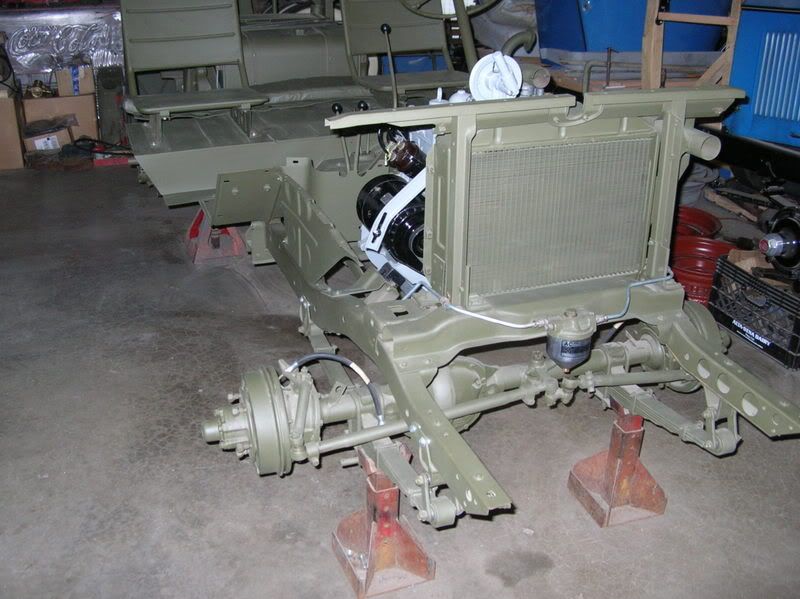
I put one of my extra frames in the hull to make sure as we rebuilt the rear under the batteries and under the spring shackles that it was all lining up with the front horn bolts and rear bolts.
Tony
Posted: Tue Jun 26, 2007 8:28 pm
by leo verhagen
Hello Tony,
Your photos look great!
I agree with you to make sure the drive train is running well before assembly.
My drivetrain (engine, transmission, transfer case and PTO) is allready running now and then on my GPW jeep frame, so far everything is great now, but in the beginning we had forgotten one gasket which caused some serious leaking :(
I am curious if your way of lowering the whole assembly at one time will work out all right. The advantage is that it will save a lot of climbing in and out of the hull, but I think the disadvantage will probably be bolting the frame to the spring hangers under the the hull.
I hope you will have enough room for handling the spanner to mount the bolts and nuts.
Bob Asselbergs told me that it was not an easy thing to do with only the frame, so I think it must be even harder with other objects mounted on the frame allreay.
But it is worth trying, let us know if it is working OK or not, so we can all learn from it.
Posted: Wed Jun 27, 2007 1:36 am
by GPA2196
Leo,
Yes, Its a balancing act... I will definitely remove the engine side compartments and main floor... but will try to keep the engine and drive train on the frame.... we shall see, I will be sure to document my adventure :) Thanks for the compliments on the pictures.... its been a long time coming, and I am very excited to finally near the end of the restoration...
Cheers,
Tony